Taking it lightly, the survival kit is a collection of useful things that you usually don't have with you when you get in trouble and need them most. Such a kit contains items that help you stay alive while waiting for the rescuers in case you get lost in the forest, experience natural or technogenic disaster or get separated from the civilization in other similar situations. The survival kit should be designed for everyone at their own discretion, although ready-made kits are also available. This article provides a general introduction what to take into account when making a DIY survival kit.
DIY survival kit size and packaging
The size of the survival kit should be such that the set can be conveniently taken with you daily, carried in a pocket, a backpack, a car. Consequently, size is the main factor determining the contents of the kit.
When choosing a storage container, several factors need to be taken into account:
- Durability. The package may be subject to various loads, including pressure, shock, heat, cold, etc.
- Capacity and shape. The choice of the right shape determines how much you can put in it. For example, from a narrow and long container it will be difficult to get out the objects that are at the bottom or put inside a wide object. In turn, such a container will be convenient for transportation. Mostly, the survival kit is made up of metal or plastic boxes with the ability to seal the lid tightly. You can use container of soluble vitamin C, but it will have a small volume.
- Weight. If the weight of the container is several times the weight of its' contents, then it must be considered if such a container is worth it.
- Tightness. You must be able to hermetically seal the container repeatedly. It's not worth using a container which won't prevent water from coming in after opening it. Otherwise you can damage all survival kit because of one match.
- Ergonomics. The packaging should be comfortable to carry it without difficulty. Especially if the survival kit is meant to be carried with you everyday in your pocket. You can experiment by putting it in your pocket or bag and carry around for some while.
- Visibility. The survival kit is designed for an emergency. If it's camouflage colored, it can easily be lost in the dark or under poor visibility. On the other hand, bright colored packaging can serve as a signal for rescuers. During the war, the survival kit will also be in your pocket or bag anyway and won't unmask you. It's preferable to choose bright neon-type or reflective color.
As mentioned before, mostly, the survival kit is made up of metal or plastic boxes with the ability to seal the lid tightly. You can also choose fabric bags, only in this case, the whole kit should be protected against moisture.
DIY survival kit's content
As already mentioned, the contents of the survival kit should be chosen by each individual, assessing the situation in which it may be necessary to use it and the restrictions on packaging and transportation. For example, if it is planned to stay outdoors in winter conditions, then insect repellent most probably won't be necessary.
Although environmental factors do not affect basic needs, there are still a number of nuances that need to be taken into account. A good knife will be more useful in the forest, while a multi-tool will be more comfortable in the urban environment. In the forest kit you can replace multi-tool with other items. Although, they do not exclude each other.
Survival kit for the forest
In this article, we will build a kit that ir intended for a wooded area and can fit in a large trouser or jacket pocket. Essential requirements for your safety are always the same: fire, shelter, water and food. Therefore, the article is divided into following sections: fire, shelter, tools, water and nutrition.
Fire
There is a choice between lighters, matches and flint. A system of pluses / minuses can help to evaluate.
| Lighters (for using in forest) |
| Advantages | Disadvantages |
| Can be reused |
Not possible to refill in forest |
| Gas lighters are easy to use in the wind |
Gas lighters can not be stored for a long time without refueling |
| Moisture resistant |
Flint may end |
| Gas lighters do not work in large cold |
|
| Bigger camp fire will be hard to kindle |
Such an analysis can be done for every subject of doubt, or if it is impossible to decide between several items.
In this case, lighters have more cons than pros. So you have to make choice between matches and the flint. The matches will not take up much space, but the flint will last a very long time, whereas more effort will be needed to get the fire. This time you can take both.
When adding the matches to the survival kit, it is advisable to protect them against moisture in advance. This is how it's done - we cut the striking surfaces from the sides of the matchbox, put them together with the rough side and put it on the adhesive tape. Adhesive tape should be 3x broader than striking surface. Then wrap the adhesive tape around (see photo).
Matches can also be protected from moisture in other ways:
- Put in a hermetic container.
- Leave the matches in the matchbox and pour them with a candle.
- Dip one or all together in a melted candle. Put them one by one on an adhesive tape and glue up or roll up as shown in the previous photo. Paraffin will protect the match from moisture and prolong its burning time. Note - as the place in the survival kit is limited, 15-20 matches will be sufficient. Once the camp fire is ready, all you have to do is maintain it. But before adding these matches to your survival kit, it is advisable to check if they work. The matches of different manufacturers vary in their chemical composition, and there are cases where the paraffin dissolves the heads of the matches.
- Place in a small dish, put on top a piece of cotton wool and then pour it all with a candle. The cotton wool with paraffin can be used for starting a fire.
It is not necessary to pack the flint. Just make sure you have a metal blade to be able to make a spark. Stainless steel or smooth polished metal won't give a good spark because it doesn't create enough friction.
Kindling
It's not always possible to find a good kindling. Especially at night or in bad weather.A dry and flammable kindling is also required for starting a fire with the flint. That's why it must definitely be a part of every survival kit.
There will be several options that can be used as a kindling. You can choose one or all of them to put into the survival kit.
- Cotton wool, one side impregnated with paraffin.
- Birch bark that have been prepared in advance in the following way:
- place birch bark in a oven at 150°. Under the influence of temperature, it will take a shape of a tight roll; important - do not overdo it! If the bark rolls too much, take it out;
- matches can be placed in the center of the bark roll;
- clog on both sides with cotton wool and cover with a candle.
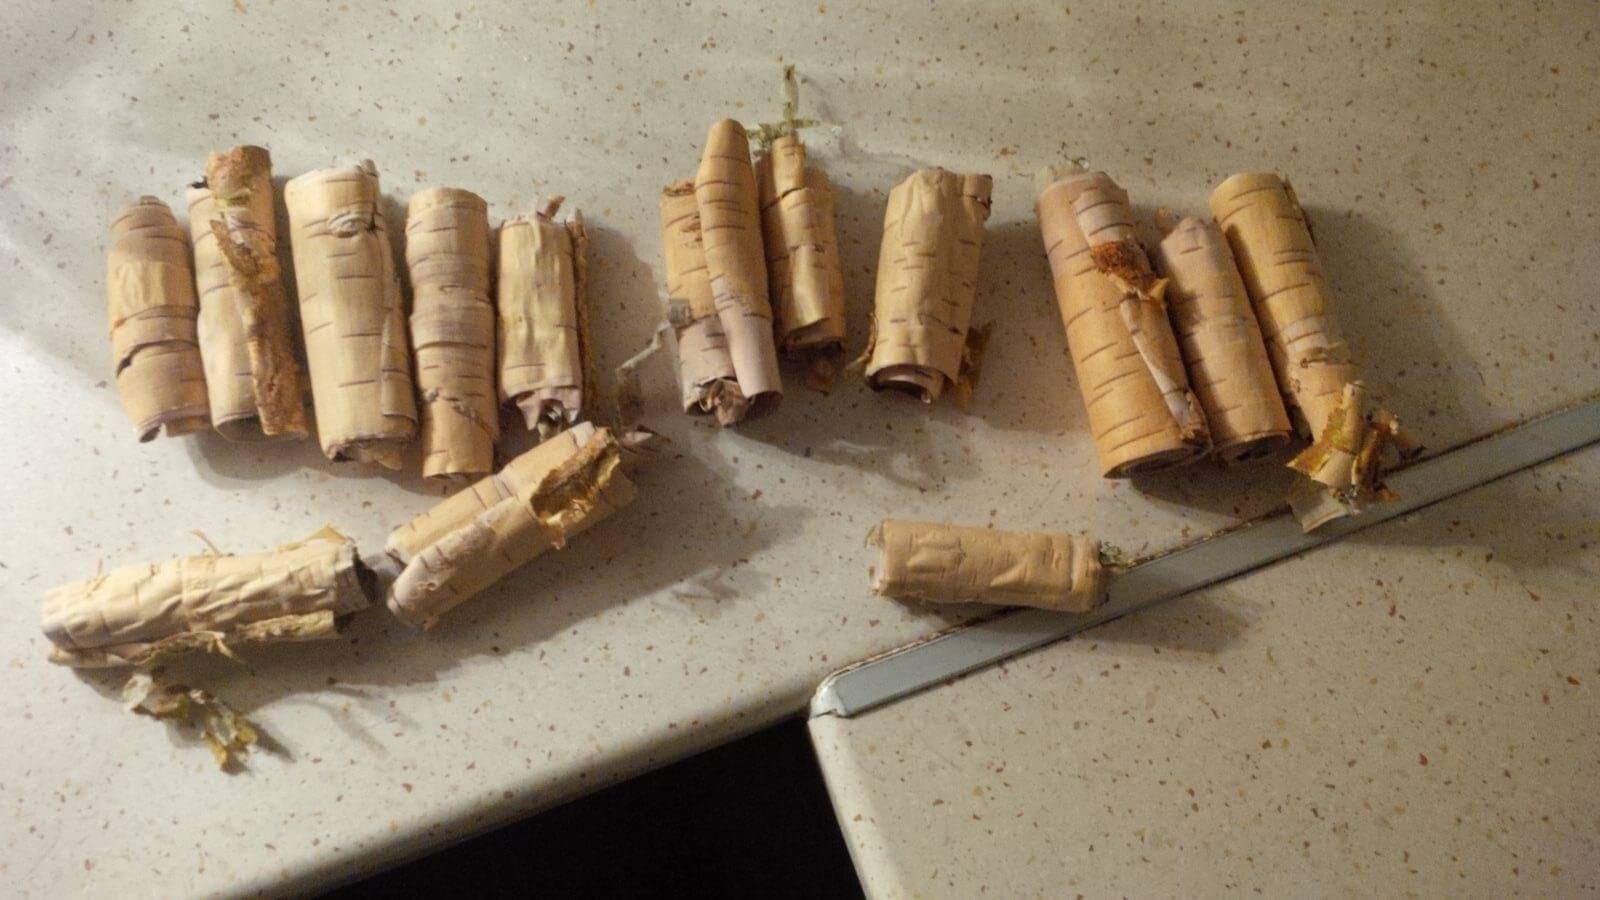
- place birch bark in a oven at 150°. Under the influence of temperature, it will take a shape of a tight roll; important - do not overdo it! If the bark rolls too much, take it out;
- Piece of candle. It won't serve as a fire starter, but will help the flame burn for longer.
- Singed linen or cotton cloth.
- Linen or cotton cloth impregnated with oil.
- Piece of resin.
- Solid fuel tablets.
- Little dish with sulfur from matches.
- Dry, resinous wooden splint.
- Manufactured spruce or pine splint.
Shelter
As the place in the survival kit is very restricted, only the minimum of the things needed to create a shelter can be put in it.
Rope. The size of the rope's diameter should not be less than 2 mm and not more than 5 mm. A smaller diameter cord will be like a thread, but for bigger one there is simply not enough space. The length of the rope is determined by the amount of space allocated to it in the container. A good solution is to wrap the rope around the container from the outside, occasionally fixing it with a hot glue. You can make several layers.
Wire. The best will be a thin, durable and flexible wire. It will be useful both for shelter construction, for garment repair, and for traps.
Poncho. If there is a place in the container, you can put poncho in it. It will be useful both for protecting yourself from the rain and for roof construction.
Tools
Knife. The most important tool for survival. If it is possible, then it is advisable to choose a Viktorinox type folding knife. Such a knife is versatile and reliable. (Knives at Lynxgear.lv)
If there is no space, you can use a blade of paper knife, which is covered with adhesive tape. If necessary, remove the the tape, add two pieces of wood on the side and lace with the same tape. And you'll get a very simple, but functioning knife. The second option is the coarser blade of a jigsaw with sharpened upper edge. Such a blade will be more durable and will combine two into one.
Saw. A useful tool, but hard to put in the survival kit. As always, there are several options. We already described one in the knife section. The second most popular option is band saw or chain saw. If the choice is in favor of the second option, it's recommended to pick one with the most coarser blade possible. The fine blades will quickly break, sawing will take a long time, but less effort. When choosing such a saw, the end anchorages, which are the weakest place and may break during working with it, must be checked in advance. You can also make such a saw yourself by using a section from a power saw chain.
Adhesive tape. Adhesive tape will be useful both for the construction of a shelter, for repairing clothes, or as a patch. The best option is to use a so-called MacGyver or duct tape. In order to increase the amount of the tape you can take with you, you can also paste it inside or outside the container's lid.
Compass. This time we will put it in the tool section. The compass also has many options. The most practical is a compact compass that does not take up much space, or a conventional small-size orienteering compass. The seond one will be better, because it's more practical. To prevent the compass from taking up space unnecessarily, it can be glued on the inside or outside of the container's lid (it doesn't apply to metal containers).
Sewing kit. It's preferable to choose a big needle with a large eye and a thick, durable thread. Small needles will cause more problems - difficult to hold in cold weather, only fine threads fit and you can easily loose it. A large needle can be used for making traps, fixing clothes and shoes. A thread of any size can be used with it. If you run out of thread, it can be replaced by a thread of a sugar bag or a potato bag, with an electric cord etc. A thick thread can also be used for making traps and shelters. You can use a fishing line to save space.
Safety pins. Can be used both for repairing and fixing clothes, for repairing equipment and also as a hook. It is advisable to have different sizes if safety pins.
Fishing line and hooks. Preferably, a set of two-sized fishing lines should be put in a survival kit - thin and thick. If there is no such option, it is better to choose a thicker one. Hooks are better to take small or medium size. You can catch a big fish on a small hook, but you won't be able to catch a small fish on a large hook. The most convenient option is to pack hooks similarly to matching boxes, sticking them on tape. Then there is a guarantee that the hooks will not disappear. The fishing line will be useful not only for fishing, but also for the construction of shelter, fixing clothes and making and traps.
Flashlight. The most convenient option is a single-diode flat-panel flashlight. Will take up a little space, but give enough light to be able to see at least something. Will serve also as a signaling device.
First Aid. If there is enough space, you can put a small amount of gauze in your survival kit. Although, in case of large wound you will be forced to use some other available resources anyway. In general, first aid section of the survival kit consists of patches and first aid tape, as well as absorbent carbon (against diarrhea) and pain relief medicines. Follow the expiration dates! The medicine can be stored in kinder surprise containers.
Mirror. Can be used for signaling.
Whistle. If necessary, can be used for signaling. Particularly useful in cases where it is not possible to scream loudly or not possible to scream at all because of a simple inflammation, a traumatic neck, or exhaustion.
Water
Drinking water is the most important factor for human survival. Without water, a person can only survive for a maximum of 3-4 nights. For obvious reasons, drinking water can not be put in this survival kit, but you can take a water purifier or potassium permanganate with you. Potassium permanganate can be used for water purification and wound disinfection. It should be remembered that it's a very powerful antiseptic. 1-2 grains will be enough for one liter of water. You can add 3-4 grains to very dirty water. For wound disinfection the liquid can be darker, but the color should not be very intense. Too strong potassium permanganate liquid is poisonous!
Nutrition
Like water, neither it's possible to put food in the survival kit. If you have spare place, you can take a small container of sugar and salt. Adding 1-2 grains of coarse salt to 1 liter of water may slightly offset the loss of salt resulting from sweating in the body. The salt, of course, can also be used as a spice. In contrast, sugar will help maintain energy levels. You can make a sweetened drink from it.
The survival kit could also contain energy bars and hematogene.
Practical tips
- On the inside of the container lid you can stick some small things with adhesive tape, for example, needles, hooks, matches.
- Consider putting more urgent items or often used items on the top – fire matches, water purifying tablets, kindling and similar items, which will be used often to get fire and clean water.
When making the survival kit, most necessary things like matches, kindling, water purification tablets etc. should be placed at the top. - Don't be afraid to use the survival kit on a daily basis. You have to get used to its' existence and train yourself to find things quickly in it, as well as try to replenish and supplement it. Only by using it, you'll be able to detect errors and defects and correct them accordingly.
- Before putting something into the survival kit, you should always make sure you have enough skills to use it. There will be no time and opportunity to experiment in a crisis situation.
Appendix
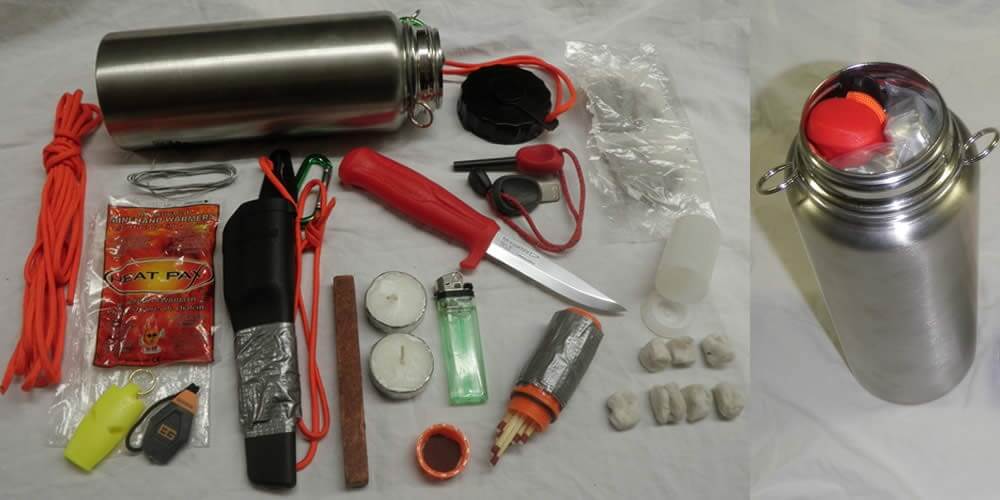
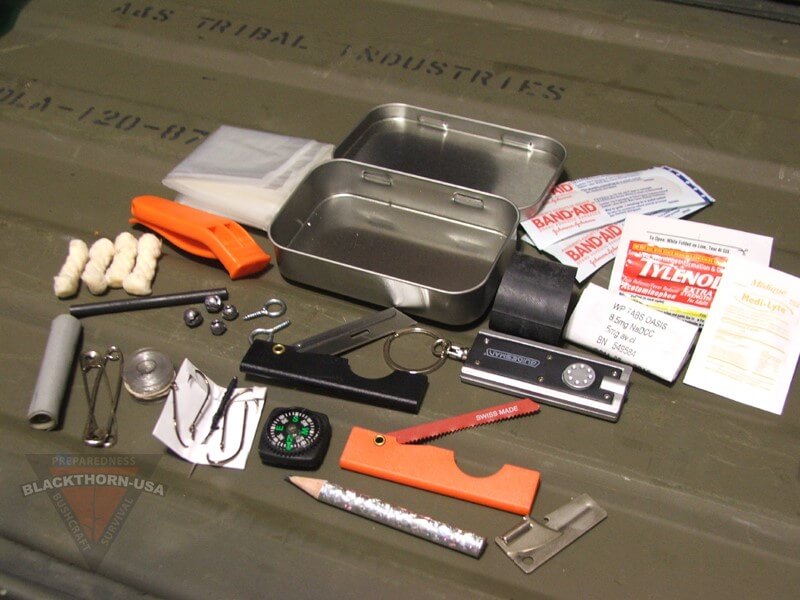
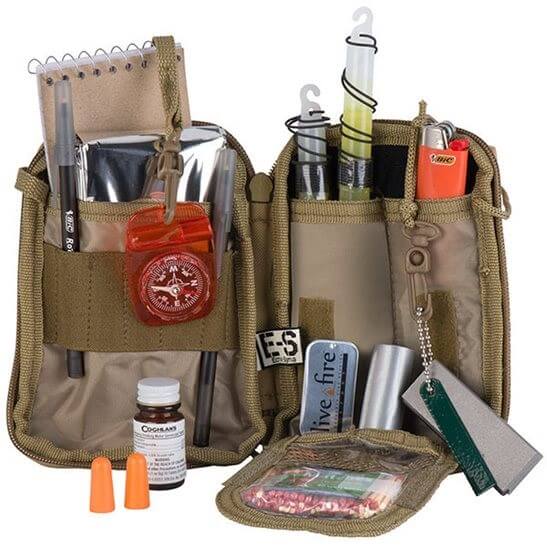
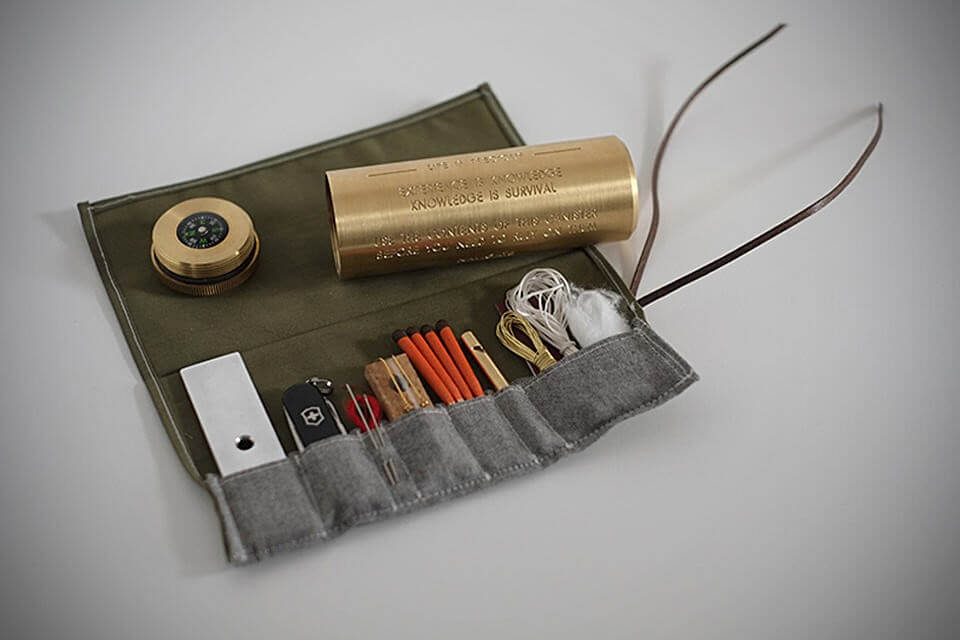
In appendix you can find photos of survival kits' samples for research and inspiration. Recalling the beginning of the article - each one makes his own survival kit himself! If you buy a ready-made survival kit and it turns out that it needs to be improved, you might end up paying twice. However, if making the set on your own seems too hard, then it's advisable to start with the ones you see in the stores and then let things clear up for you during the period of time.
Survival kits and accessories at Lynxgear.lv store - here.
Below are examples of different survival kits from which to get ideas for your kit.
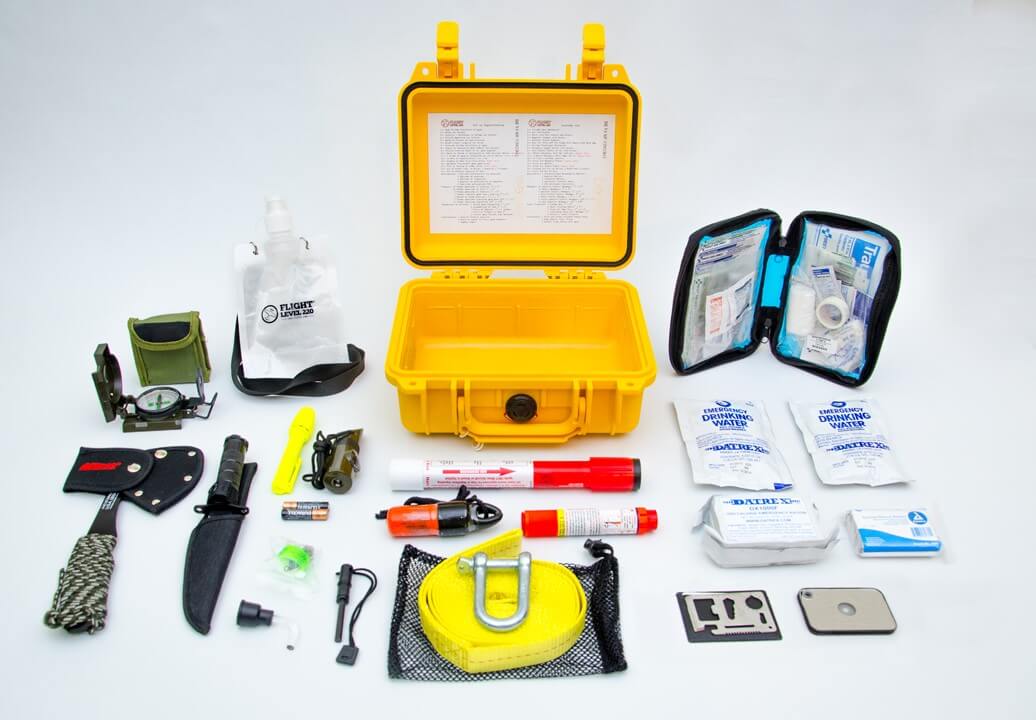
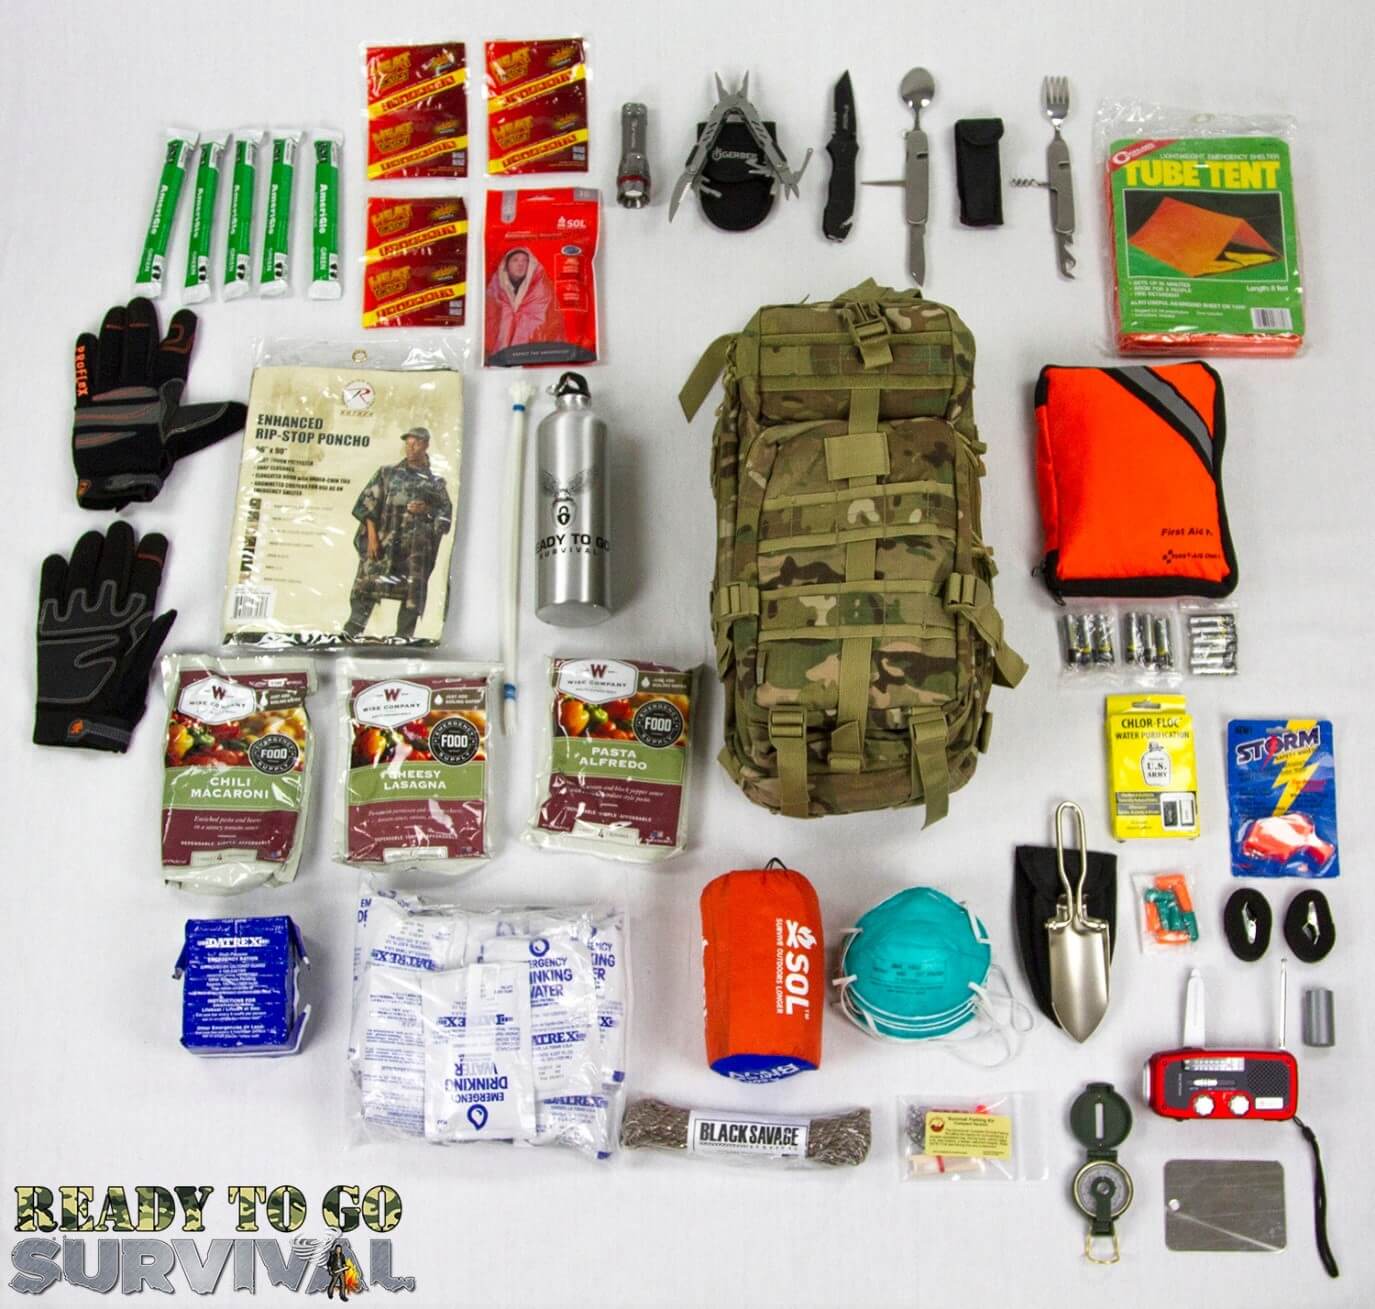
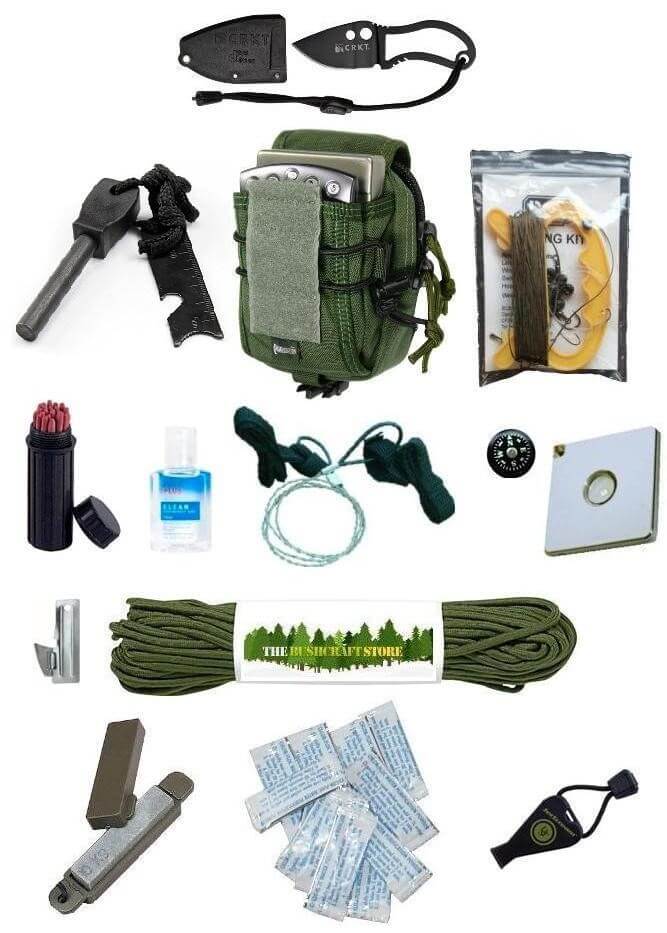

The author of the article - M. Ruģēns (FB Page- Āra dzīves knifi, padomi un viedokļi), edited by H. Galino (Lynxgear.lv). Article is arranged with permission of the author. Reproduction without permission of the author is prohibited.


